Summer Scrap Elimination 2019 Week 3
- Jul 4, 2019
- 3 min read

Good morning, my fellow scrappers! I hope your 4th of July celebrations were fabulous if not still ongoing!
This week we are making something simple that we all need to have in our collection, a plastic bag storage bag. I found it somewhat hilarious to make a bag to store shopping bags in, but I liked making this one so much that I'm making it for all my friends especially those with dogs that need to have bags on hand for walkies.
The materials you will need for this are super easy, but unlike the last couple weeks they are not quite as specific because you can vary the design in as many ways as you like.
Approximate cut list:
Two large scraps at least 19" wide of any width (I used two of the same width, but that's optional)
Several scraps of any width, but of equal length (I used pieces 1 1/2" wide left over from a previous project)
You can make any variation on this in terms of putting pieces together
1 large scrap of lining material (any left over fabric) measuring 18" x 19"
Two pieces of elastic at least 6" long (I used left overs from a twirly skirt I made for my niece)
Step 1:
Use your smaller scraps to make a colorful center. My first one used alternating scraps of blue and orange measuring 1 1/2" x 7". No matter what the size of your scraps, you will build out the center portion until it is 19" wide. I trimmed my last piece down just a bit to make it work.
Step 2:
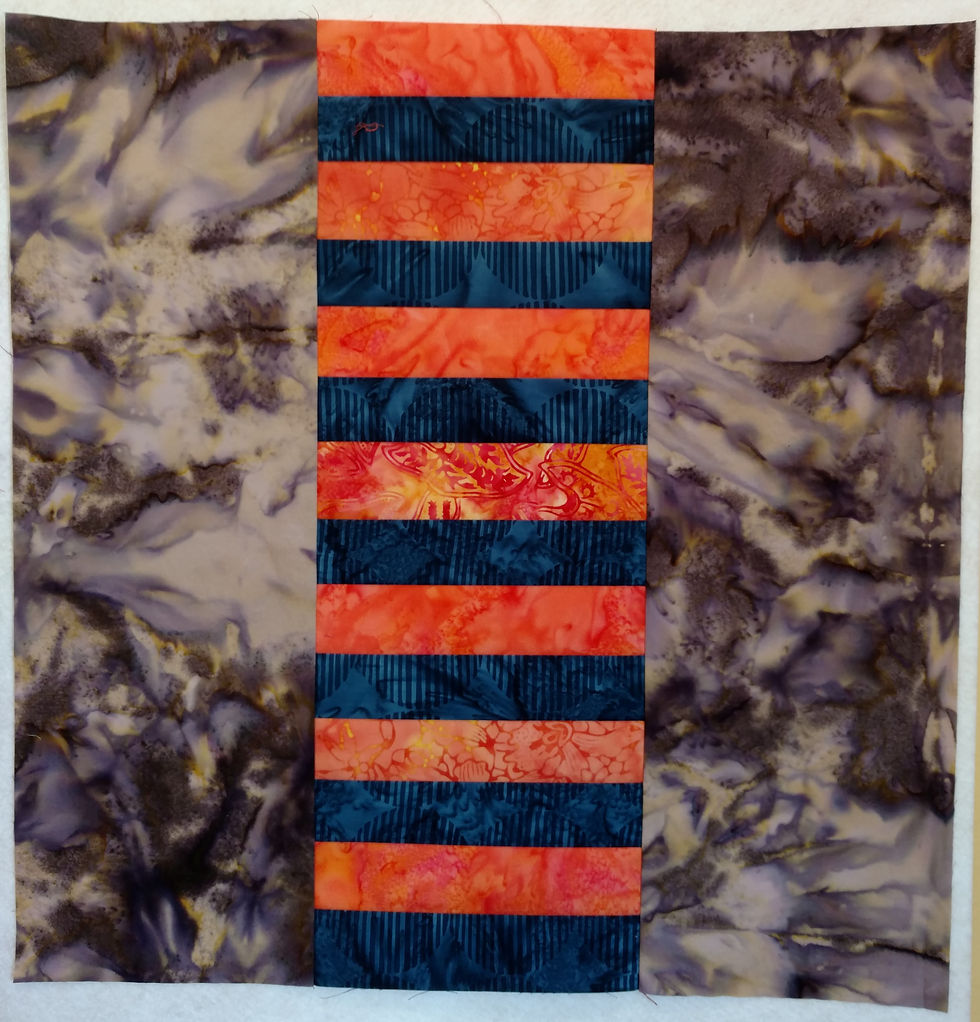
Add the two large 19" wide scraps to either end of the colorful center and trim to the resulting piece to measure 19" wide by 18" long. My results looked like this.
As you can see, you can really make this rectangle with any sort of scrap piecing or left overs. You can also make this rectangle a long as you like. I made another one that was 19" wide and 24" long so it would hold more bags when completed.
Step 3:

Fold the rectangle in half with right sides together, and stitch the two ends together to form a tube that is 18" long by 9 1/2" wide.
Do the same with the 18" x 19" scrap. so that you have two matching tubes.
Turn the pieced tube right side out and press.
Step 4:

Slide the plain tube inside the pieced tube so that the ends match up as shown. I pair both seams and pin into place.
Step 5:

Stitch around both ends to secure the two tubes together. Your lined tube is now ready to press.
Turn the tube wrong side out and follow the directions in Step 6.
Step 6:
Turn the edge of both ends over 1/2" and press.

Turn both edges over a second time, this time turn the edge

by approximately 1 1/4" or at least 1/2" greater than the width of your chosen elastic.

Both ends will now look like the adjacent image. Double stitch the turned edge, leaving a 1" gap to allow you to thread in the elastic.
Be sure to backstitch at the beginning and end of each stitch line.
Step 7:

To thread in the elastic, I use a long safety pin secured to the end of the elastic.
Thread the elastic into both ends of the tube through the 1" gap left in the double stitching.
Draw the elastic tight enough to leave a small opening, trim the extra elastic, and either stitch the ends of the elastic together or secure with a small safety pin.
Turn the bag right side out and voila! You have completed the project!
As you will see when you have completed your first bag, this project goes quickly! I made two in an afternoon and have plans to make at least a dozen more. I love this idea for paired fabrics I have left over from a quilt. The fabrics already match and I can easily put some plain fabrics at the ends of a pretty center and finish up in no time at all! I know what all my dog owner friends are getting for Christmas!
Be sure to check out the blog post on Facebook and share your version of the project. Next week we're going to make another quilt block and it's one I ended up liking a lot more than I expected. I hope you will too! Also, next week we'll have a new give-away for you, so stay tuned and find out what fun things we have to offer you in Week 4.


Comments